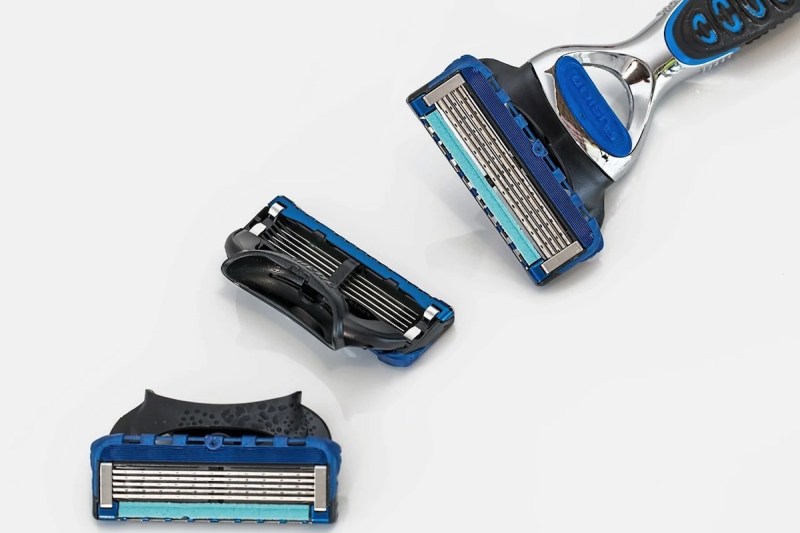
There are certain aspects of men's grooming that, at times, seem to go by the wayside or may often be overlooked. Whether it's a matter of time management or just ignorance, some things need to have a higher priority. Cleaning your razor is one of those. Properly cleaning your electric razor or safety razor with each use and giving it a deep clean about once a week, depending on how often you shave, will not only increase the lifespan of your razor but drastically improve the condition of your skin.
This will also save you money on disposable razor heads because you will have to buy fewer of them. We put together this easy guide to cleaning your razor blades so that you can get the most out of your shaving routine. Trust us, it will have both your razor and your skin looking smoother and fresher than ever.
The key step to optimizing your shaving routine that most guys skip is cleaning your razor on a regular basis. So, how should you get started? Here is our guide for you, demonstrating how to clean your razor, giving you your best shave each and every time.
Why Is It Important to Clean Your Razor?
Cleaning your razor helps keep the blades sharp and the gel strip smooth and lubricated. Razors blades that are not well cared for will wear out faster. More importantly, cleaning your razor is a matter of safety. Razors that aren’t thoroughly cleaned after use can accumulate dead skin cells and debris, which can harbor bacteria. If you cut yourself when shaving -- which is all the more likely if your razor has gunk and buildup from not being properly cleaned -- bacteria from the grime can enter your bloodstream and cause skin infections. Even if you rarely cut yourself visibly,

How to Clean An Electric Razor
If you use an electric razor, you may be lucky enough to have one that comes with a sanitation and cleaning station, which cleans and dries the razor automatically so it’s ready to go for your next shave. If you don’t have an automatic cleaning station for your electric razor, you’ll need to clean the blades or foils manually. Here’s how to do it:
Step 1: Remove trapped hairs
If you dry shave, you’ll need to remove the top of the electric razor to expose the blades or foils. Most electric razors with rotary blades flip open, while clippers or those with foils often pop off. Use a razor brush or a soft small toothbrush to swipe out loose hairs. Try to avoid tapping the razor against anything to loosen the hairs, but if you need to, tap gently on the body or plastic part of the razor, not near the blades.
If you shave with shaving cream or gel, you’ll need to rinse the razor to remove the gunk.
Replace the cutting block after you’ve removed as much hair as you can.
Step 2: Add liquid soap to the blades
Wet the blades and then add a few drops of dish detergent or antibacterial liquid soap to the blades.
Step 3: Run the razor to allow it to create suds
Turn the razor and let the blades create a sudsy lather for 15 seconds. Add more water as necessary.
Step 4: Thoroughly rinse the razor
Run the razor blades under warm water to rinse away all the soap.
Step 5: Take the head off and rinse it
Turn off the razor, remove the head or cassette, and rinse it, and be sure to get all sides and in between foils or blades.
Step 6: Allow the razor to air dry completely
Leave the razor disassembled to air dry completely in a well-ventilated space.

How to Clean A Wet Razor
Cleaning a regular safety razor -- even if it has disposable razor blade cartridges -- is a necessary addition to your shaving routine. A little extra time will go a long way, here's what to do:
Step 1: Rinse the blades after every stroke
Though it’s common to be in a hurry while rushing through a morning shave before work, one of the key ways to prevent buildup between and around your razor blades is to rinse the blade or blades after every stroke. Rinsing after every stroke washes away the hair, shaving cream, and accumulated cells, which can prevent clogs around the blades. Rinse with very hot water by letting them run through the cartridge from back to front over the blades. This will help clean off any trapped hair and shaving products. If you prefer not to keep the water running, you can fill the sink basin or a cup with clean hot water and vigorously swirl your razor between strokes.
After rinsing, shake off excess water before proceeding to the next stroke. Do not tap the razor blades against the side of the sink. Most people naturally do this, but it can damage the blades and will cause them to wear out faster.
Step 2: Disinfect your razor
When you’re done with your shave, repeat the first step one last time. Then, disinfect the razor blades by soaking the head of the razor in a small dish of rubbing alcohol (isopropyl alcohol) with a strength of at least 70. Distilled white vinegar or hydrogen peroxide are also viable options, though rubbing alcohol is preferable. Give it 30-60 seconds in the alcohol to help sterilize the blades, and then shake off the excess alcohol. If your razor is looking particularly grimy or the handle has gunk built up, you can actually soak the entire razor in a dish of rubbing alcohol for 5-10 minutes for a deep clean.
Step 3: Hang your razor in a dry place
Allow your razor to air dry thoroughly in a well-ventilated space. Avoid storing in a drawer if possible. Most toothbrush cups or racks have additional spaces for a razor. Do not use a towel to dry your razor as this can damage the blades. Also, do not store your razor in a wet area like the sink or shower. This can cause the blades to rust and encourage mold and bacterial growth.
Overview Tips and Tricks for Cleaning Your Razor
- If your electric razor cannot get wet, simply use a dry brush.
- Use compressed air to blast out trapped hair.
- Use a Q-tip with a little rubbing alcohol to sanitize the blades or foils.
- Clean your razor every time you shave to prolong the life of the razor and ensure your shave is sanitary.
- Buy a razor brush, a small tool you can use before the disinfecting step to loosen any trapped debris that did not come out in the rinsing step.
Editors' Recommendations
- Do you have white bumps on your face? It might not be acne
- It’s time to change your skincare routine: Experts reveal tips and tricks for summer
- The 12 best pre-shave oils to get your closest, most comfortable shave yet
- Father’s Day gift guide: The best grooming products for dad
- Follow these 10 tips to get rid of razor burn ASAP


